How to upload station data
November 28th, 2008 by Ricardo PírizYou can now upload and process your own station data (RINEX files). There are two ways to upload RINEX files: on the web (for all users) or by ftp (for *pro* users only).
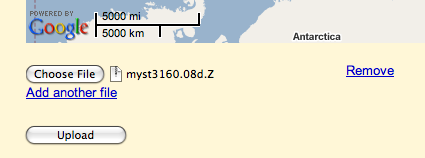
On the web, just go to “My Stations” on the upper right corner of your account and then click on “Upload RINEX files” at the bottom of the page. Note that a single compressed file containing multiple RINEX files is supported.

By ftp, just connect to the magicgnss.gmv.com server using your magicGNSS account’s username and password. You can of course do bulk file upload and automate it using ftp. On UNIX, a convenient scheme is to combine NcFTP (ncftpget and ncftpput commands) with cron. Ftp upload is available for *pro* users only. Please note that in case of uploading your RINEX files via ftp on Windows, after logging with your user, command “bin” shall be executed prior to uploading the RINEX files by means of “put” or “mput” commands.
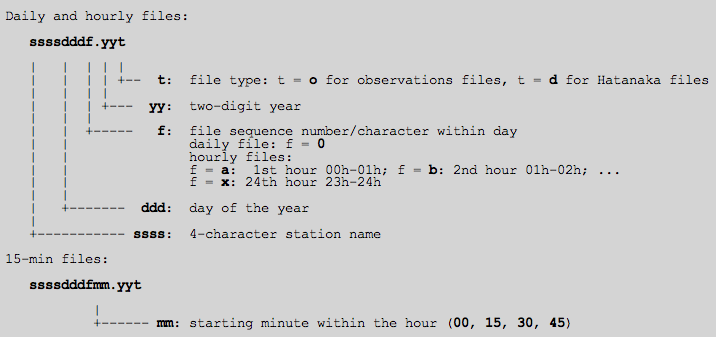
The RINEX 2.10 and 2.11 format versions are supported by magicGNSS. You can upload normal observation files and Hatanaka files. You can also upload compressed files in .Z, .gz, and .zip formats. The following data rates are supported, in seconds: 30, 15, 10, 5, and 1. Daily, hourly and 15-min RINEX files are supported but your files must be compliant with the RINEX filename convention, otherwise they will be rejected by the server:
Whatever your RINEX filename case, it will always be converted to lowercase by magicGNSS, including the 4-character station name. All station names in magicGNSS (core and user stations) are in lowercase.
The “APPROX POSITION XYZ” record on the RINEX header is mandatory, and the coordinates cannot be zero. The PPP and ODTS algorithms need the approximate user station coordinates as initial values. An error of up to several meters is allowed in the approximate antenna position on your RINEX file.
magicGNSS needs the following observables: P1 (or C1), P2, L1 and L2. magicGNSS uses the P1-P2 iono-free code combination. If your RINEX file does not have P1, do not worry, the C1 code will be automatically converted to P1 using the CC2NONCC program (v6.2). However, for CC2NONCC to work properly, the receiver type on the RINEX file header (“REC # / TYPE / VERS” record) must match the IGS equipment database. You can verify this with teqc +v.
The RINEX files that you upload are uncompressed on the fly and decimated to a 30-second rate. Your RINEX files will add up to your used disk quota. If your account is full you will not be able to upload more data files. Files larger than 100 Mb cannot be uploaded. There is also an upload limit of 100 Mb per hour. RINEX files older than one month (as per their filename) will be automatically deleted from your account (except for *pro* users).
Once you have uploaded your station data, just go to the “Stations” tab on your PPP scenario and select any combination of My Stations and RINEX files to be processed. You can process up to 10 stations in PPP. User stations can also be added to the ODTS process (for *pro* users only).


